RLM Licensing of Hololight Space
Thank you for choosing to use Hololight Space. This guide will walk you through the process of
obtaining, using, and managing your Hololight Space license files. These files allow you to quickly
and securely activate Hololight Space and use its full breadth of features with eas+e.
Getting your Hololight Space license file
There are two ways to get a Hololight Space license file. Depending on your organization’s needs,
you can use cloud-based licensing or generate your own licenses on a private machine acting as a
licensing server. There are advantages specific to each setup, and in the planning process Hololight
will assist you in choosing a solution, and this guide will help you make that solution a reality.
Cloud-based licensing
With Hololight Space cloud-based licensing, you will receive your licensing file directly from
Hololight. You don’t have to do anything more than that. Once you have your license file you can
continue on to activating Hololight Space.
Private on-premises licensing server
Hololight Space cloud licenses require an internet connection at some point in the activation
process. Because of this, they are not appropriate in all circumstances. If your organization has
security needs that demand use of Hololight Space within a private network isolated from the
internet, you will need to set up a private licensing server to create licenses to use with Hololight
Space.
Installing your licensing server
- When you’ve decided to use a private licensing server to activate Hololight Space, the process
will begin with Hololight sending you a package or installer with the necessary files.
- Transfer the file package or installer to a folder on the server machine you will use to generate
your licenses. The destination folder should be appropriate for files you will store permanently
on the server machine. We recommend using the "C:" drive.
- Extract the files from the ZIP file or run the provided installer. A new folder will appear.
Rename the new folder to "RLM" if it isn’t named that already.
- Open the start menu and type "Powershell" in the search bar. Then select the application in the results.
- Using Windows Powershell, navigate to the "RLM" folder you set up earlier.
cd C:\rlm - Once in the "RLM" folder run:
.\rlmutil.exe rlmhostid uuid - Once the program finishes, Windows Powershell will display the machine’s UUID. This will look
like the example below. The long sequence of seemingly random letters and numbers is the
UUID.
Hostid of this machine: uuid=57c8eba5-46a1-457f-87b7-16734692fe49 - Send the UUID back to your Hololight contact.
Running your licensing server
- Hololight will do some configuration on their end. Then they will send you the following file:
ServerAdmin_FloatingSeats.lic
Download this file and place it in your "RLM" folder, the same folder set up earlier which contains "rlm.exe". - In the "RLM" folder, double click "rlm.exe". A window will appear. Select "More info" then select
the button "Run anyway". A Command Prompt window will then appear, showing that the
server is running. The server will only run for 10 minutes before you need to restart it again.
Once you’ve changed the admin password for the server this will no longer be the case. We will
do that soon though. Do not close the Command Prompt window.
- Open a web browser. In the address bar type:
localhost:5054
If the server is running correctly, you should see the "Reprise License Server Administration" panel in your browser. - On the left side menu sign in with the following temporary credentials.UsernameadminPasswordadmin
- Now we will change the password to both improve security and make sure that sever can run
for more than 10 minutes at a time. Having signed in with the temporary credentials, select the
"Change Password" button on the left side menu.
- On the page that appears, enter your new password into the two fields and select "CHANGE
PASSWORD". Be sure to remember this password for future use.
With that done, once you start the server it will continue to run until you decide to stop it or power off the machine.
Installing the service
You are able to run your private licensing server, but every time you shut down and restart the
machine you will need to start the server again this same way. By installing a service the server will
run automatically when Windows starts.
- Open the start menu, type “cmd” in the search bar, right-click “Command Prompt”, and then
select “Run as administrator.”
-
Use the cd command to navigate to your "RLM" folder.
cd c:\rlm - Now you can install the service. Take care that the path for the log matches your "RLM" folder.
rlm -install_service -dlog +C:\RLM\server.log - . If you are successful, you will just see a new blank line. Now you can start the service.
sc start rlm
Details about the service will appear, along with a “START_PENDING” status as the "STATE". You should see “RLM” in your Windows Services.
Now the licensing server will start automatically every time your start the server machine.
Creating Hololight Space license files
Your licensing server is running, but to activate Hololight Space you need to create a license file.
You can copy and share this license file with members of your organization that will use Hololight
Space on your server’s network. For each seat purchased with your license, a single instance of
Hololight Space can run on your server machine’s network, verified by the server you set up
earlier.
- Hololight will send you a file named "HoloLightSpace_To_OnPremiseSever_Template.lic". This is
a template for creating a license file. Open this template using a text editing application like
"Notepad.exe".
- Open the start menu, type "cmd" in the search bar, and select "Command Prompt". Type and run
the following command:
ipconfig
Command prompt will output a series of data. The IP address is the number next to "IPv4 Address". - Back in Notepad, in the last line of the template file, replace the text "YOUR_SERVER_ADDRESS"
with the IP Address from Command Prompt. The last line should look like this:
SERVER 192.168.123.132 ANY
If you need to restrict the ports, replace "ANY" with the port number you want to use.
You now have a Hololight Space license file. You can rename it, but remember to keep the ".lic"
extension. Copy this file and share it with anyone who will use Hololight Space on your private
network.
Activate Hololight Space with your Hololight
license file
In order to use the full version of Hololight Space you need to install, configure, and activate the
license. You can then deactivate your license by releasing it.
If you received a license file from Hololight make sure your PC is connected to the internet. If you
generated your own license file, make sure that your PC is connected to the same network as your
private licensing server.
Installing the Hololight Space license file
- Open Hololight Space.
- On the menu on the left, select "Licensing".
- On the "Hololight Space License" panel, scroll down to "Select New License File" and select the
browse button.
- Browse to the folder where you saved your license file. Select it and open it. Hololight Space will
then automatically move the file to the correct location.
You can alternatively place the file in the correct folder yourself, located here: C:\Users\user1\3d objects\Hololight Space\Licensing.
Configuring the license
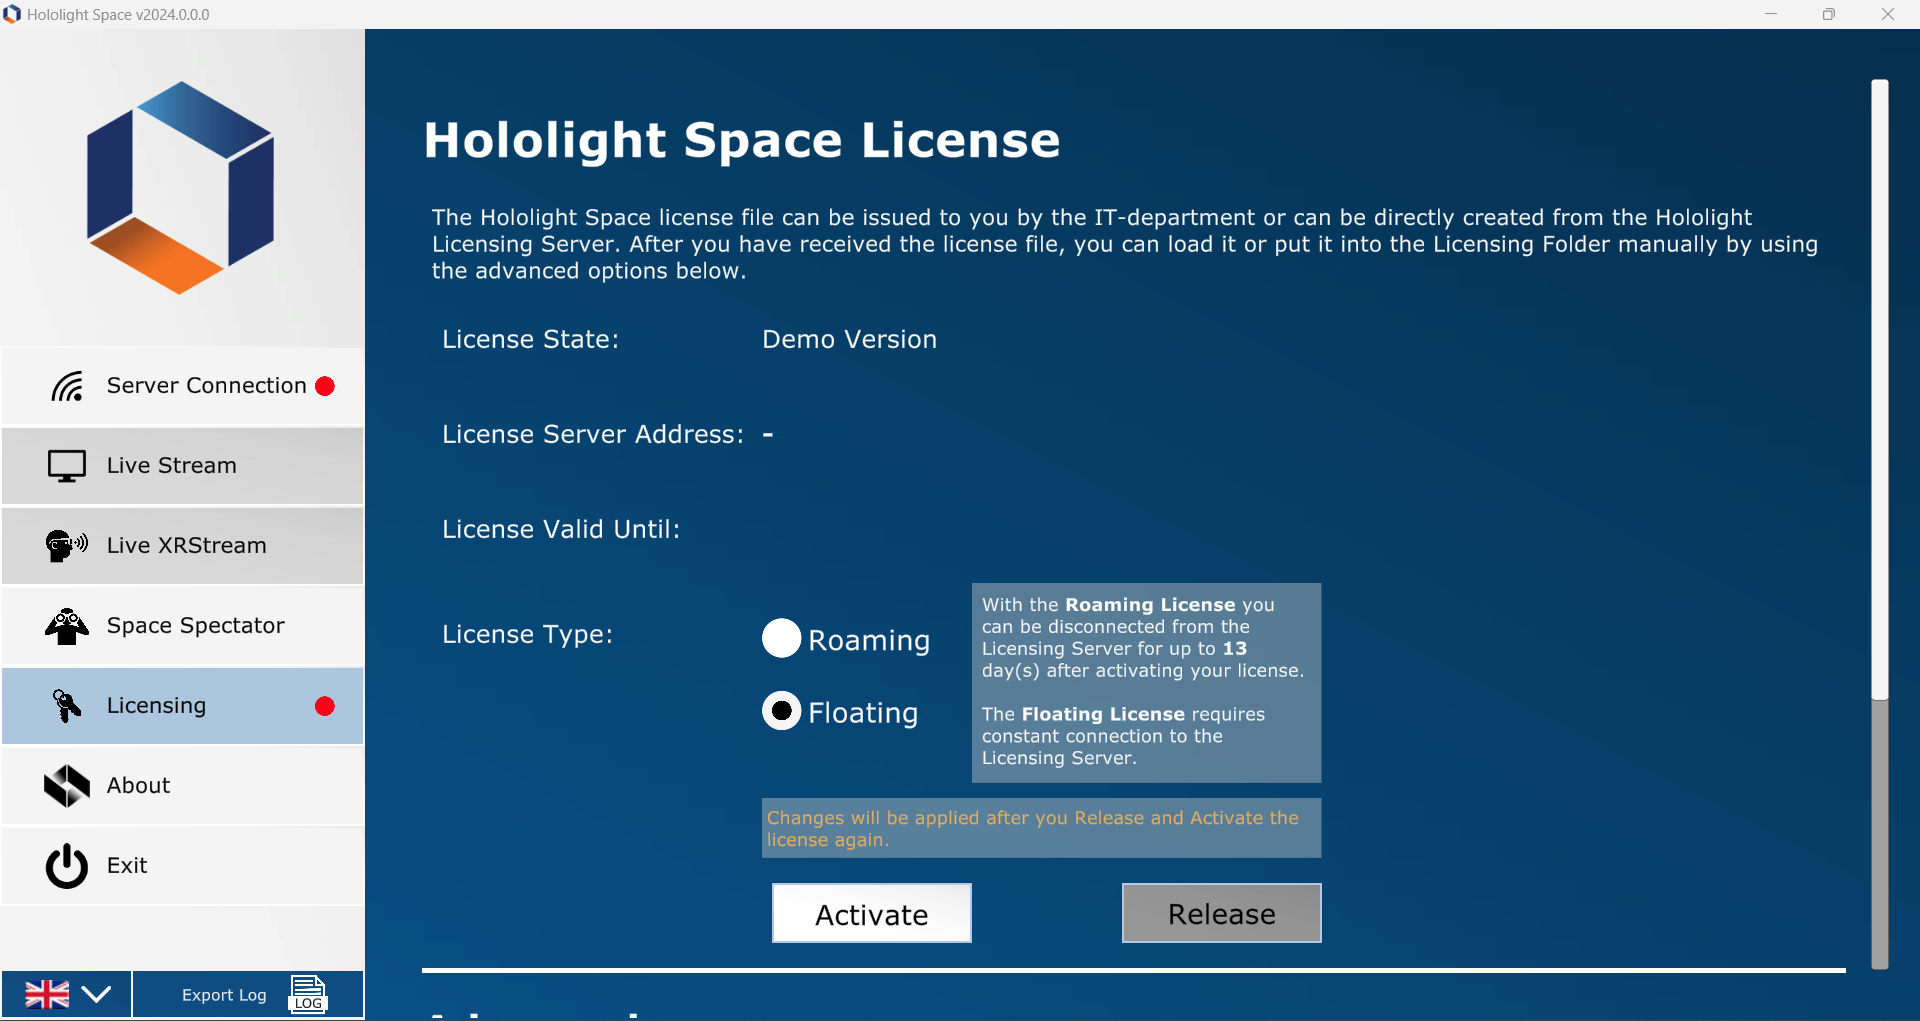
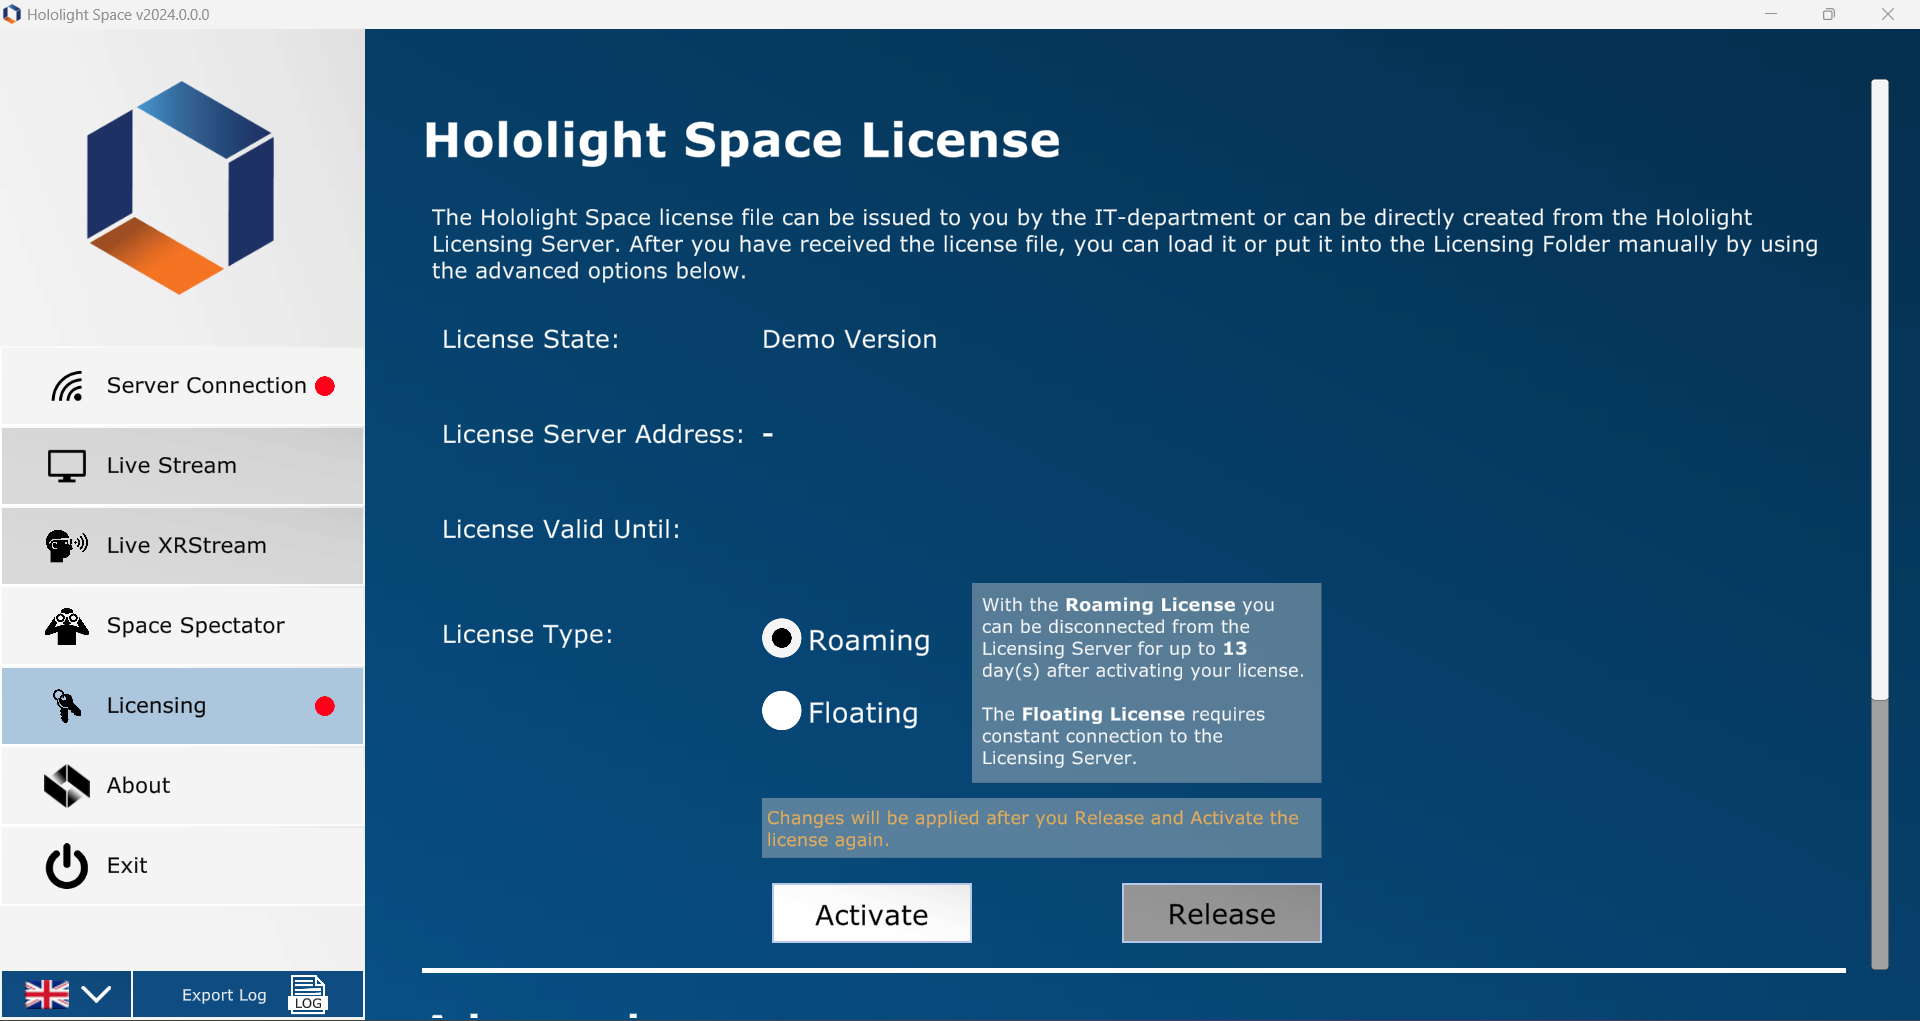
Before activating the license you need to select a license type on the "Hololight Space License" panel
under "License Type". Different license types have different advantages, allowing you to flexibly
and easily control access to the license as best fits your needs
When to use a floating license

A floating license lets you use Hololight Space for up to 13 days without needing to connect to the
internet. After 13 days the machine running Hololight Space needs to reactivate the license while
connected to the internet. You can then use Hololight Space with your license for another 13 days
before having to repeat the activation.
When to use a roaming license

A roaming license lets you use Hololight Space as long as your license is valid. However, your
machine always needs to stay connected to the internet in order to use Hololight Space with this
type of license.
Once you’ve selected the best license type for your situation, you are ready to activate Hololight
Space.
Activate your license
Once you’ve installed your license file and chosen your license type, you can activate your license.
If a valid license already exists in the correct folder, Hololight Space will activate the license
automatically.
- To activate your license select the "Activate" button.
- If the activation is successful, a green "Server Reachable" icon will appear. You can now use
Hololight Space with your license.
Release your license
Sometime it is necessary to release a license. You might want to change the license type before
reactivating or maybe allow someone else to use the license.
- To the release a license, select the "Release" button on the "Hololight Space License" panel.
- When the green "Server Reachable" icon disappears, the license is free.
Related Articles
Hololight Space 2024.0.0.0 Release Notes
Hololight Space Release Notes - v2024.0.0.0 Mari Maruyama Schweinberger, Yassmine El Khaoudi, and Alex Konieczny version 2024.0.0.0, June 2024 Table of Contents Hololight Space Main application New features and improvements Main Menu Space Manager ...Hololight Space LT 2023.1.1.0 Release Notes
Hololight Space LT 2023.1.1.0 Release Notes Release Month: March/2024 Version: 2023.1.1.0 Highlights Import Multiple Objects with a single interaction. Unified Main Menu + Quick Tools Menu. New language support (beta): Japanese. What's new in this ...Hololight Space 2023.1.1.0 Release Notes
Hololight Space 2023.1.1.0 Release Notes Release Month: March/2024 Version: 2023.1.1.0 Highlights Support for new devices: Meta Quest 3 and Magic Leap 2. Focus Plane hologram stability via Hololight Stream - HoloLens 2 and Magic Leap 2 devices. ...Licensing of Hololight Space
The process of licensing Hololight Space is streamlined and user-friendly. Upon obtaining your license key (HoloToken), which is generated through our license management portal, you are on the verge of completion. To ensure a smooth licensing ...Troubleshooting Guide for Hololight Space
Welcome to the Hololight Space (LT) Troubleshooting Guide – Your comprehensive resource for addressing common issues. We are committed to ensuring your seamless experience with Hololight Space. Within this guide, you will discover curated solutions ...